Wednesday, April 5, 2023

Date, time and number format in layouts

Walkthrough for Date, time and number format on the Label layouts work in the Microsoft Dynamics 365 SCM

In this blogpost I am going to explain the Date, time, and number format configuration available in the Label layout page and how to make it work.

Go to Warehouse management > Setup > Document routing > Label layout.
You will notice Date, time, and number format field there. This field control how numbers and dates were formatted on the printed label. For example, you can have a requirement that numbers need to be formatted - the decimal dot/comma and the thousands dot/comma/tick and so on. Previously it was not possible, for example, to use US number format with European WMA user (or vice-versa). Now you can have it configurable.

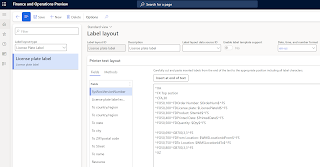
Let's imagine that I have the following label layout for license plate labels. I have both number field -Qty and date field - PrintedDate.

Label layout for license plate labels


^XA

^FX Top section 
^CFA,30
^FO50,100^FDOrder Number: $OrderNum$^FS
^FO50,200^FDLicense plate: $LicensePlateId$^FS
^FO50,300^FDProduct: $ItemId$^FS
^FO50,400^FDPrinted Date: $PrintedDate$^FS
^FO50,500^FDQuantity: $Qty$^FS

^FO50,690^GB700,3,3^FS
^FO50,700^FDFrom Location: $WMSLocationIdFrom$^FS
^FO50,750^FDTo Location: $WMSLocationIdTo$^FS
^FO50,800^GB700,3,3^FS

^XZ

In my scenario, I will be using Chrome emulator to present the results. 

So, if you try to print license plate label using the layout above no matter what you select in the Date, time, and number format, it will not change formatting of the date and number. 

But as soon as you add :d to the Date field, it will make a difference.

^FO50,400^FDPrinted Date: $PrintedDate:d$^FS

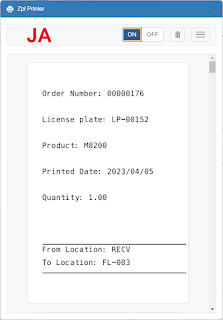
I have printed 3 labels and for each label I changed the Date, time, and number format field. Pay attention to the Printed Date on the label and how it changes. 

DA Label

DE Label

JA Label

The same story with the Qty.

As soon as you add :N to the number field, it will make a difference.

^FO50,500^FDQuantity: $Qty:N$^FS

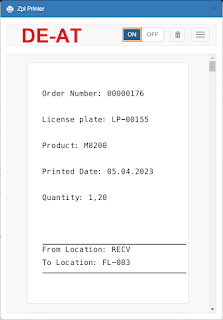
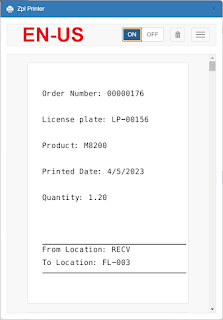
I have printed 2 labels and for each label I changed the Date, time, and number format field. Pay attention to the Quantity on the label and how it changes. 
DE-AT Label

EN-US Label


That's it! I hope it helps.


Friday, March 24, 2023

How you print custom labels in SCM

Custom label layout type feature that has been released in 10.0.33 allows you to print any labels for any tables. It is a beneficial especially in the retail industry, for food and beverage customers .

With this feature you can print the following at the minimum:

  • Item labels
  • Item barcode labels
  • Customer labels
  • Vendors labels
  • Locations
  • Fixed locations for items
  • On hand
  • LPs
  • Container Ids

You might be aware of other ISV solutions that have this capability like DSI Print Envoy (ISV), but now SCM also supports this out of the box.

In this blogpost, I will go through some of the example above.

Let's start with printing locations. 

Print locations

1. Set up Label layout data source

Go to Warehouse management > Setup > Document routing > Label layout data source.
Select New and set the following values:
  • Label layout data source ID: Locations.
  • Description: Locations.
  • Label layout type: Custom label.
  • Custom label root table: WMSLocation.
Label Layout data source

2. Set up Custom label layout

Go to Warehouse management > Setup > Document routing > Label layout.
Set the Label layout type field to Custom Label.
Select New and set the following values:.
  • Label layout ID: Locations.
  • Description: Locations.
  • Label layout data source ID: Locations.
On the Printer text Layout FastTab, enter the ZPL code below.

CT~~CD,~CC^~CT~
^XA~TA000~JSN^LT0^MNM,0^MTT^PON^PMN^LH0,0^JMA^PR8,8~SD15^JUS^LRN^CI27^PA0,1,1,0^XZ
^XA
^MMT
^PW831
^LL609
^LS0
^FT40,59^A0N,28,28^FH\^CI28^FDLocation^FS^CI27
^FT19,148^A0N,42,43^FH\^CI28^FDLocationID: ^FS^CI27
^FT230,148^A0N,42,43^FH\^CI28^FD$WMSLocation_1.wMSLocationId$ ^FS^CI27
^BY3,3,180^FT116,525^BCN,,Y,N
^FH\^FD^FS
^PQ1,0,1,Y^XZ

 Label layout

3. Set up Warehouse management parameters

Go to Warehouse management > Setup > Warehouse management parameters.
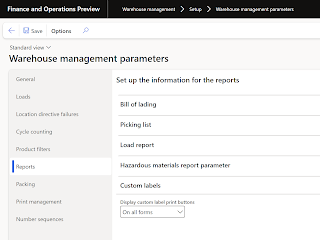
On the Reports tab, on the Custom labels FastTab, set the Display custom label print buttons option to On all forms.

Warehouse management parameters
 

4. Printer setup 

Go to Organization administration > Setup > Network printers
Make sure Printer is Active
Network printers       

5. Print location label

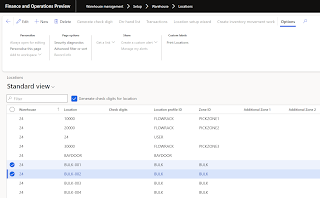
Go to Warehouse management > Setup > Warehouse > Locations.
Select one or more records.
On the Action pane, on the Options tab, in the Custom labels group, select Print locations.

Location label

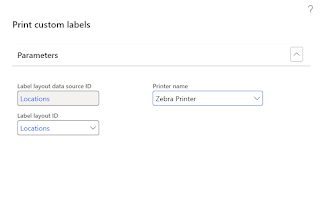
In the Print custom labels dialog box, set the following fields:

  • Label layout ID: Locations.
  • Printer name: Select the printer that you want to print from.


Print custom labels

 Notification will appear stating how many labels were sent to print.

Print location

And 2 labels will be printed.
Printed labels


If you want to have multiple labels for the same data source, you can also do it. 
For instance, to the example above we would like to have different labels for the locations and locations with on-hand details from the locations. First label we have configured already. Now let's set it up the second label with on hand details:


Go to Warehouse management > Setup > Document routing > Label layout data source.
Select New and set the following values:
  • Label layout data source ID: LocationsInventSum.
  • Description: Locations (+InventSum).
  • Label layout type: Custom label.
  • Custom label root table: WMSLocation.

Label data source 

On the Action Pane, select Edit query.
On the Joins tab, add the InventSum table through Inventory dimensions table.
Select OK.


Edit query


Go to Warehouse management > Setup > Document routing > Label layout.
Set the Label layout type field to Custom Label.
Select New and set the following values:.
  • Label layout ID: LocationsInventSum.
  • Description: Locations (+ InventSum).
  • Label layout data source ID: LocationsInventSum.
On the Printer text Layout FastTab, enter the ZPL code below.
 
{{LabelStart
^FX ... ZPL commands that will be printed on every label ...
CT~~CD,~CC^~CT~
^XA
~TA000
~JSN
^LT0
^MNM,0
^MTT
^PON
^PMN
^LH0,0
^JMA
^PR8,8
~SD15
^JUS
^LRN
^CI27
^PA0,1,1,0
^XZ
^XA
^MMT
^PW831
^LL609
^LS0
}}
{{Header
^FT31,59^A0N,28,28^FH\^CI28^FDLocation with on-hand^FS^CI27
^BY3,3,180^FT116,300^BCN,,Y,N
^FH\^FD$WMSLocation_1.wMSLocationId$^FS
}}
{{Row Table=InventSum_1 StartY=400 IncY=68 RowsPerLabel=5
^FT19,$position.YPos$^A0N,42,43^FH\^CI28^FDLine:^FS^CI27
^FT128,$position.YPos$^A0N,42,43^FH\^CI28^FD$InventSum_1.ItemId$^FS^CI27
^FT250,$position.YPos$^A0N,42,43^FH\^CI28^FD$InventSum_1.AvailPhysical$^FS^CI27
}}
{{LabelEnd
^PQ1,0,1,Y
^XZ
}}

Go to Warehouse management > Setup > Warehouse > Locations.
Select one or more records.
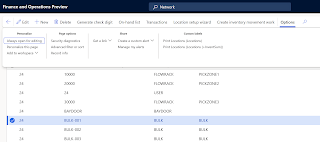
On the Action pane, on the Options tab, in the Custom labels group you can see 2 buttons since we have multiple label data sources for the same root table
Locations


On the Action pane, on the Options tab, in the Custom labels group, select Print Locations (Locations (+ InventSum)).
In the Print custom labels dialog box, set the following fields:

  • Label layout ID: LocationsInventSum.
  • Printer name: Select the printer that you want to print from.

Print locations with InventSum

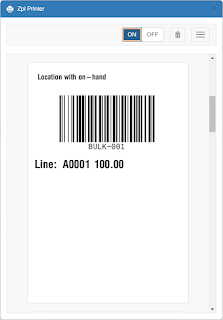
Label is then printed


Printed label

That's it for today! 

Wednesday, February 22, 2023

License plate label printing with new Label layout in Microsoft Dynamics 365 Supply Chain Management

In this blog post I would like to go through the new Label layout for License plate labels. This is a new capability that is available in 10.0.31.

This is quite powerful capability especially in the following situations:

- when you need to display on the label additional information that is not available in the WHSLicensePlateLabel table. Maybe you need to add information from the corresponding document that is stored, for example, in the Purchase order;
- when you need to display on your labels values with country-specific decimal and thousands separator;
- when you need to generate labels with repeating rows or even multiple labels out of one template.

Let's walk through the configuration and process.

Set up warehouse management parameters

To set up warehouse parameters for license plate label printing, follow these steps:

  1. Go to Warehouse management > Setup > Warehouse management parameters.
  2. On the License plates FastTab, make the following settings:
    • Use label layouts for license plate labels - Choose whether the system should use label layouts instead of document routing label layouts.  Set this to Yes to use label layout feature for license plate labels.


Create a license plate label layout

The label layout controls what information is printed on the label and how it's laid out. Here, you enter the ZPL code that is sent to the printer. Typically, you will copy this code from a label designer program.

As the system generates a label, it can replace field and method names that are used in the label layout with actual values. 

First label layout that we are creating is simple one. Only data from license plate table is printed on the label.

  1. Go to Warehouse management > Setup > Document routing > Label layout.
  2. At the top of the list pane, set the Label layout type field to License Plate Label.
  3. On the Action Pane, select New to create a label.
  4. Set the following values for the new label:
    • Label layout ID: Enter License plate.
    • Description: Enter License plate.
    • Label layout data source ID: Leave this field blank. (Only license plate data will be used.)
    • Enable label template support : Leave this option set to No for now. When it's set to Yes, you can add header, row, and footer elements to your layout
    • Date, time, and number format: Leave this field blank. This field is used to set the formats of date, time, and number values that are shown in a label layout, as described later in this article
5. Copy the following example of a ZPL container label.

CT~~CD,~CC^~CT~

^XA~TA000~JSN^LT0^MNM,0^MTT^PON^PMN^LH0,0^JMA^PR8,8~SD15^JUS^LRN^CI27^PA0,1,1,0^XZ

^XA

^MMT

^PW831

^LL609

^LS0

^FT19,59^A0N,28,28^FH\^CI28^FDLicense plate label^FS^CI27

^FT19,148^A0N,42,43^FH\^CI28^FDItem: ^FS^CI27

^FT128,148^A0N,42,43^FH\^CI28^FD$ItemId$ ^FS^CI27

^BY3,3,180^FT116,525^BCN,,Y,N

^FH\^FD$LicensePlateId$^FS

^FT19,206^A0N,42,43^FH\^CI28^FDQty:^FS^CI27

^FT128,206^A0N,42,43^FH\^CI28^FD$Qty$^FS^CI27

^PQ1,0,1,Y^XZ

6. On the Printer text Layout FastTab, paste the copied text into the large field.

7. Close the page.


 Second label layout that we are creating is when we need to display data from Purchase order . 

1. Go to Warehouse > Setup > Document routing > Label layout data source.

2. Create a label layout data source that includes a join to the Purchase order table.

3. On the Action Pane, select New.

4. Set the following values for the new label layout data source:

Label layout data source ID: Enter LPPlusPurchOrder.

Description: Enter License plate + Purchase order.

Label layout type: Select License plate label.

5. On the Action Pane, select Save.


6. On the Action Pane, select Edit query.

7. A standard query editor dialog box appears. On the Joins tab, add a join to the required tables.

8. Go back to the Label layout page, and then, in the Label layout data source ID field, select the new record for a new or existing layout.

9. You can now add the new field values to the print layout code. Be sure to reference the correct table.field-names values in the ZPL code. The additional tables will include a number (_#) as a suffix.

Example will look as below:


CT~~CD,~CC^~CT~

^XA~TA000~JSN^LT0^MNM,0^MTT^PON^PMN^LH0,0^JMA^PR8,8~SD15^JUS^LRN^CI27^PA0,1,1,0^XZ

^XA

^MMT

^PW831

^LL609

^LS0

^FT19,59^A0N,28,28^FH\^CI28^FDLicense plate label^FS^CI27

^BY3,3,180^FT116,525^BCN,,Y,N

^FH\^FD$WHSLicensePlateLabel.LicensePlateId$^FS

^FT19,148^A0N,42,43^FH\^CI28^FDItem: ^FS^CI27

^FT128,148^A0N,42,43^FH\^CI28^FD$WHSLicensePlateLabel.ItemId$^FS^CI27

^FT19,206^A0N,42,43^FH\^CI28^FDQty:^FS^CI27

^FT128,206^A0N,42,43^FH\^CI28^FD$WHSLicensePlateLabel.Qty$^FS^CI27

^FT19,264^A0N,42,43^FH\^CI28^FDOrder:^FS^CI27

^FT128,264^A0N,42,43^FH\^CI28^FD$PurchTable_1.PurchId$^FS^CI27

^PQ1,0,1,Y^XZ


Third label layout that we are creating is when we need to use more complex structure header, row and footer . We will do it with the help of label template support

If you must create more advanced label layouts, you can benefit from using some of the widely available label generation tools that are described in Document routing label layout.

To format a label by using header, row, and footer elements, open the Label layout page, select or create a layout, and set the Enable label template support option to Yes for the new or selected layout. Then use the {{Header ... }}, {{Row ... }}, and {{Footer ... }} elements in your code. The following example shows a label that includes all these elements. It prints data about items that are placed in a license plate.

First, we need to create label layout data source.


And the Query


Define to print only Put lines


Option 1:


{{LabelStart

^FX ... ZPL commands that will be printed on every label ...

CT~~CD,~CC^~CT~

^XA

~TA000

~JSN

^LT0

^MNM,0

^MTT

^PON

^PMN

^LH0,0

^JMA

^PR8,8

~SD15

^JUS

^LRN

^CI27

^PA0,1,1,0

^XZ

^XA

^MMT

^PW831

^LL609

^LS0

}}

{{Header

^FT31,59^A0N,28,28^FH\^CI28^FDLicense plate label with work lines^FS^CI27

^BY3,3,180^FT116,525^BCN,,Y,N

^FH\^FD$WHSLicensePlateLabel.LicensePlateId$^FS

}}

{{Row Table=WHsWorkLine_1 StartY=148 IncY=68 RowsPerLabel=5

^FT19,$position.YPos$^A0N,42,43^FH\^CI28^FDLine:^FS^CI27

^FT128,$position.YPos$^A0N,42,43^FH\^CI28^FD$WHSWorkLine_1.LineNum$^FS^CI27

^FT250,$position.YPos$^A0N,42,43^FH\^CI28^FD$WHSWorkLine_1.WMSLocationId$^FS^CI27

}}

{{LabelEnd

^PQ1,0,1,Y

^XZ

}}

Option 2:

{{LabelStart

^FX ... ZPL commands that will be printed on every label ...

CT~~CD,~CC^~CT~

^XA

~TA000

~JSN

^LT0

^MNM,0

^MTT

^PON

^PMN

^LH0,0

^JMA

^PR8,8

~SD15

^JUS

^LRN

^CI27

^PA0,1,1,0

^XZ

^XA

^MMT

^PW831

^LL609

^LS0

}}

{{Header

^FT31,59^A0N,28,28^FH\^CI28^FDLicense plate label with work lines^FS^CI27

^BY3,3,180^FT116,300^BCN,,Y,N

^FH\^FD$WHSLicensePlateLabel.LicensePlateId$^FS

}}

{{Row Table=WHsWorkLine_1 StartY=400 IncY=68 RowsPerLabel=5

^FT19,$position.YPos$^A0N,42,43^FH\^CI28^FDLine:^FS^CI27

^FT128,$position.YPos$^A0N,42,43^FH\^CI28^FD$WHSWorkLine_1.ItemID$^FS^CI27

^FT250,$position.YPos$^A0N,42,43^FH\^CI28^FD$WHSWorkLine_1.QtyWork$^FS^CI27

}}

{{LabelEnd

^PQ1,0,1,Y

^XZ

}}


Make sure that network printers setup.


Specify date, time, and number formats

To set the formats of date, time, and number values that are shown in a label layout, open the Label layout page, select or create a layout, and set the Date, time, and number format field to the language that uses the formats that you want.

Set up license plate label routing

To specify the license plate label layouts that are used and where they are printed, you must define a Document routing record, as described in the following procedure.

1. Go to Warehouse management > Setup > Document routing > Document routing.

2. In the Work order type field, select Purchase orders option.

3. On the Action Pane, select New to create a routing record.

4. On the header of the new routing record.

5. On the Document routing printers FastTab, assign the printer and label layout that should be used when the criteria for the routing record are met. Select New on the toolbar to add a line to the grid. 


Set license plate labels to be printed automatically when purchase orders are received

If you want a license plate label to be printed automatically each time that a new purchase order is received, you can configure eigher work template with Print step or mobile device menu item.

Option 1

1. Go to Warehouse management > Setup > Work> Work templates.

2. In the Work order type field, select Purchase orders option.

3. On the Action Pane, select Edit.

4. Select the work template that license plate labels should automatically be printed for. If you're working with sample data, select the row where the Work template ID field is set to 24 PO Receipt.

5. Select New in the Work Template Details section.

6. For the new work template line, set the following fields:

○ Work type – Select Print . 

○ Work class – Select Purchase.

7. Select Save. 

8. Use Move up button to place new line between Pick and Put lines.

9. Close the page.

 Option 2 (most preferable way of doing it)
1. Go to Warehouse management > Setup > Mobile device > Mobile device menu items.

2. Select New.

3. Create a record that has the following settings:

○ Menu item name: Mixed

○ Title: Mixed LP receiving

○ Mode: Work

○ Work creation process: Mixed license plate receiving

Print label : Yes


4. Add the new mobile device menu item to the menu

5. Go to Warehouse management > Setup > Mobile device > Mobile device menu.

6. Select Inbound menu.

7. In the tree, select the menu item that you created before.

8. Select Edit.

9. Select the arrow to add the menu item to the menu.

10. Select Save.

11. Close the page.


Run a scenario to print license plate labels

Create PO with 2 items


In this scenario we will be receiving items 3 times, and for each time will be changing document routing layout to see the difference between layouts. 

Log in to mobile device emulator

https://xxx.operations.dynamics.com/?mi=action:WHSWorkExecute&cmp=USMF

Select Mixed LP mobile device

Scan LP number

Scan PO number

Scan Item 1 and Qty 1

Scan Item 2 and Qty 2

Select LP complete


Select OK

License plate label will be printed. In this scenario we selected first layout where we print only license plate label details from the license plate table. 


Item is blank, because Item on LP label is actually blank since contains multiple items.

Let's select the second label layout in the Routing to see how it looks. 

We will be using the same PO, just create another LP in the mobile device


LP printed. Now we see that additional information is getting printed (order number) from the purchase order table. 

And Label generated as below

And now let's check the last layout where we have repetitive header with license plate ID and rows from the license plate items.


And license plate label is generated as below.

Note: If for some reason label is not printed, make sure you set the right query on the Label Layout data source and it does not contain criteria that are not valid for your scenario.

Another point worth mentioning is that you might notice different behavior for printing LP label by using Print label option on mobile device menu item or if you are using Work template line step Print. 
The reason because license plate labels generated differently. 

In case of Print label on the mobile device menu item: There will be 1 LP label generated for multiple items within the same LP and Item number will be blank on the label.
In case of Print step on the work template: There will be as many LP labels generated as many items within the same LP and Item number will be set for each label.

That's it for today!

Monday, February 13, 2023

Vendor bank account change proposal workflow in Microsoft Dynamics 365 Supply Chain Management

In this blog post I am going to walk through the new Vendor bank account proposal workflow feature. 

The vendor bank approval workflow in Dynamics 365 Supply Chain Management ensures that bank data submitted by suppliers is secure, financially compliant, and protected against fraud. Businesses can evaluate and approve any incoming changes to a supplier's bank account information and make sure the provided bank details meet their organization's standards and policies. This helps reduce the risk of fraud by detecting and preventing unapproved changes. 

When you enable the vendor bank account workflow, any changes submitted for specific bank-details fields will be sent through the workflow for approval. You can configure approval triggers and decide whether to invoke the approval workflow when a supplier’s bank details are created, changed, or both.

Enable the feature

Enable Vendor bank account change proposal workflow feature in the Feature management workspace


Set up the vendor workflow
Before you can use the workflow feature, you must enable it.

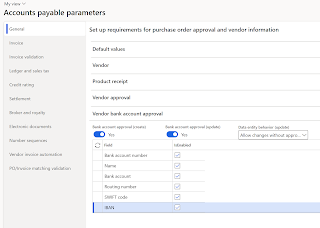
Go to Accounts payable > Setup > Accounts payable parameters.
On the General tab, expand the Vendor bank account approval FastTab.
  • Set the Bank account approval (create) option to Yes to send changes to the workflow upon bank account record creation.
  • Set the Bank account approval (update) option to Yes to send changes to the workflow upon bank account record update.
In the Data entity behavior (update) field, select the behavior that should be used when data is imported:
  • Allow changes without approval – The data entity can update the vendor bank account record without processing it through the workflow.
  • Reject changes – Changes can't be made to the vendor bank account record. The import will fail for the fields that are enabled for the workflow.
  • Create change proposals – All fields will be changed except the fields that are enabled for the workflow. The new values for those fields will be added to the vendor bank account as proposed changes, and the workflow will be started automatically.
In the list of vendor bank account fields, select the IsEnabled checkbox for every field that must be approved before the changes can be made.
Go to Accounts payable > Setup > Accounts payable workflows.
Select New.
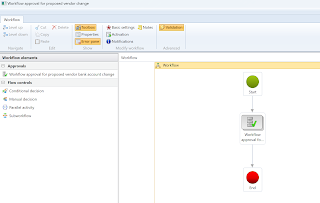
Select Workflow approval for proposed vendor change.

Set up the workflow so that it matches your approval process. The Workflow approval for proposed vendor bank account change workflow approval element will apply the changes to the vendor bank account.


Add vendor bank account information and submit to the workflow for approval

If Bank account approval (create) option is enabled in the Accounts payable parameters, when you create a vendor bank account record and save the record, Workflow button will be available. 

Go to Accounts payable > Vendors> All vendors.
On the Action pane, select Vendor tab and select Bank accounts option in the Set up section.
Select New to create a new bank account.
Fill in all required fields.
Select Save.


Select Workflow button and chose Submit.
Bank account must be approved before it can be used throughout the system.


Change vendor bank account information and submit the changes to the workflow
When you change a field that is enabled for the workflow, the Proposed changes page appears. This page shows the original value of the field and the new value that you entered. The field that you changed is reverted to its original value. A status message will inform you that your changes haven't been submitted.


Every time that you change a field that is enabled for the workflow, that field is added to the list on the Proposed changes page. To discard the proposed value for a field, use the Discard button next to the field in the list. To discard all changes, use the Discard all changes button at the bottom of the page. Select OK to close the page.

After you have at least one proposed change, two additional tabs appear on the action pane: Proposed changes and Workflow.

Select Proposed changes to open the Proposed changes page and review your changes.

Select Workflow > Submit to submit the changes to workflow.


Review status filed:
  • Draft - record has been created and has not been submitted for approval. All fields are editable in this state
  • Approved - record has been approved
  • Approved, changes not submitted - previously approved record has been changed but not yet send for approval.
  • Approved, pending changes - changed record has been submitted for the approval

The workflow follows the standard workflow process. The approver is directed to the Vendor bank account page where the changes can be reviewed on the Proposed changes page and then select Workflow > Approve to approve the workflow. After all approvals are completed, the fields are updated with the values that you proposed.

That's it!

Friday, December 9, 2022

Confirmed ship and confirmed receipt dates calculation on the sales order line in Microsoft Dynamics 365 Supply Chain Management

Have you ever wondered how the system actually calculates the dates for order promising? I hear a lot of questions about it and I decided to draw a simple flow.

Next time, when you see the system recommends some date, you will know why exactly it proposes that date. Keep in  mind that a lot of configurations are taken into account during the calculation.


That's it!


Tuesday, December 6, 2022

Manual packing from A to Z in Microsoft Dynamics 365 Supply Chain Management

In this blog post I will go through different options for manual packing in Microsoft Dynamics 365 Supply Chain Management. It will cover majority of the capabilities available for manual packing.

We will be going through 4 scenarios

  1. Move products to packing station for manual packing and move containers to the final shipping location immediately once packing is completed.
  2. Move products to packing station for manual packing and create a work to move containers to the staging location once the packing is completed. 
  3. Move products to packing station for manual packing and create a work to move containers to the baydoor location once the packing is completed. 
  4. Sort packed containers before shipping.

Useful links:

Manual packing functionality in Warehouse management in Microsoft Dynamics AX 2012 R3 - Microsoft Dynamics 365 Blog

Improved packing functionality (Dynamics 365 for Operations 1611) - Microsoft Dynamics 365 Blog

Outbound sorting - Supply Chain Management | Dynamics 365 | Microsoft Learn

Introduction to Containerization - Automated packing process in Microsoft Dynamics AX 2012 R3 - Microsoft Dynamics 365 Blog

Combined use of Manual packing and Containerization functionalities in an outbound process - Microsoft Dynamics 365 Blog


Scenario #1: In the first scenario we will configure the simple flow:

Goods are picked from the Bulk location and put into Pack station for manual packing. Then worker manually pack items into containers. Once items are packed, items are moved to Baydoor location right aways.

Let's start with the minimal configuration required to process the scenario described:

First what we need is to create Packing location type, Packing location profile, and Pack location

Packing location type:


Packing location profile:


Pack location (This location will be used to move items from Bulk location for packing):


Then we need to create container types where we will be packing our products to. 
Container types:

It is necessary to define Maximum net weight. 

We then need to define default Packing location type in the Warehouse management parameters. 

Warehouse management parameters:

We need to create Wave template to control our shipping process. 

Wave templates:

We need to create Work template to move products from Bulk location to Pack location upon Sales order process. 

Work template:


For Work template we need work classes and directive code.

Work class:

Directive code:


Now we need to determine from where we are picking products and where we are moving to. 

Create Location directive to pick products from BULK. 


Create Location directive to put products to Pack location.


Now let's configure Container packing policy that will control what should happen when we complete packing. In our scenario we will be moving our containers to the Baydoor location right away. Without any work creation. 
For this scenario it is important to set Container release policy = Make available at final shipping location and define Default location for final shipping. 

Container packing policy:  

We need to create Packing profile that we will be selecting upon packing. You can create different packing profiles and then select specific when you do pack. 
Packing profile: 

We are done with configuration, let's see the process. 
Walkthrough:
Create sales order and reserve inventory

Select Warehouse tab and then choose Release to warehouse.
Work is created to pick items from BULK location and put them into Pack location.

Let's complete work to speed up the process by using Complete button.  

Now it's time for packing. 
Go to Warehouse management > Packing and containerization > Pack
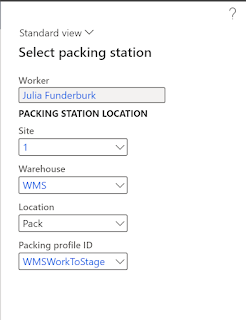
Make sure to select Pack location where we move our products to and select Packing profile created earlier. 


Select Shipment ID of the sales order released. 

Select New container and select Container type where you would like to pack your items in.

Select Item identifier.

Select Close container.
After container close, your containers will be moved to the Baydoor location and Shipment will be updated to Loaded. It means that sales order can be shipped. 


Scenario #2: 

What if we do not need to move containers immediately to final shipping locations. What if we need to create a work to move containers and then any available worker will pick it up and move it to the desired location. In this scenario, we are going to create a work to move containers to Staging location. 

Make sure you create Stage location type, Stage location profile, Stage location and set Staging location type on the Warehouse management parameters for this scenario.

We will continue with what we have configured for scenario 1 and advance it with what we want to achieve in this scenario. We will create another Container packing policy and Packing profile.

Work templates, Location directives to move products from BULK to PACK - are without change. But we need to create another work template and location directives to create work to move containers from PACK to Stage location and then to BAYDOOR.

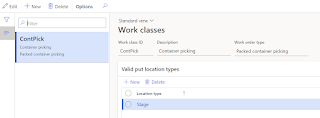
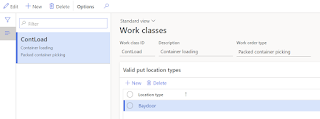
Let's create a work template Packed container picking that will be used to move items from Pack location to Staging location and then to Baydoor.

Work template:

For this work template we need 2 work classes:


Create 2 location directives to move containers to Stage and to move to Baydoor.


We need to create Container Packing policy that will create work to move containers. It is important to select Container release policy = Create work to move containers and then select Work template.
And then we need to link Packing Profile with Container packing policy.
Now we are ready to go with the process.

Walkthrough: 
Create Sales orders, release it and complete work to move items to Pack station similarly as it was done for scenario 1. 
Go to Pack station.
Select Packing profile created previously to create work to move items to stage location.

Create new container and pack all items. 
Close container.

Once you close, you will notice the message that Work has been created. As you can see the work has been created to move containers from Pack location to Stage and then from Stage to Baydoor. 


Scenario #3
In the scenario above we moved containers to Stage location, but you can also create a work to move items to Baydoor location without staging. You just need to change the configuration a little bit.

Create a new work template to move to Baydoor.
Location directive still will be without change since we already have location directive to move to baydoor.
We need to create another Container packing policy and select the work template that will move containers to Baydoor instead of Stage. 

Packing profile will look like:

Now you are able to use this packing profile in the Pack station, and once the container is closed - work will be created to move containers from Pack station to Baydoor.

Scenario #4

In addition to the flow above, you can also send the containers to the Sorting location to sort packed containers.

We would need Sorting location type, sorting location profile and Sorting location and set Sorting location type in the Warehouse management parameters. 
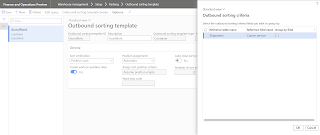
We need to create Outbound sorting template:

Edit query:
Outbound sorting template breaks:

Create new Container packing policy. It is important to set Container release policy = Assign container to outbound sorting position and select Default location for sorting. 

Create new Packing profile and assign Container packing policy created.

Our Location directives, work templates and wave templates for sales orders will be without change. 


We are going to pick up goods from location where they are available and put them into Pack location, where we will proceed with manual packing.

Since in this scenario, after container close, we will be moving containers to Sort location we need to determine where we need to move containers after sorting. We will move them to the baydoor. And for this we need to create new location directive and work template.

Location directive to move items from SORT location to Baydoor.

Work template:

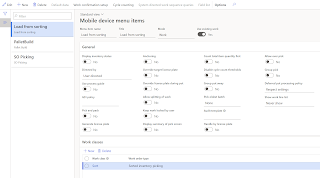
We will also need to create Mobile device menu items to perform sorting. 


We are done with configuration, let's proceed with the process.

Walkthrough: 

Create Sales order, reserve inventory and complete work that will move items to Pack station (Nothing new, the same as before)


Pack items in the Pack station with the created Sort packing profile (the same way as before)


Close the container. Now your containers are moved to the Sort location.

On the mobile device, select Pallet build.

In the LP/Con field, enter the first container ID that is associated with sales order 1.


Select OK.

Because no sort positions currently exist, you must specify one. In the Sort position ID field, enter SP02.

Because no LP is currently associated with sort position SP02, you must specify one. In the LP field, enter LP02.


Select OK.

Because sort position validation is turned on, you must enter the sort position ID again. In the Sort Position ID field, enter SP02.

Select OK.

You receive a "Work completed" message.

Now you need to close a position.
On the mobile device select Pallet build.
In the LP/Con field, enter a container ID that was sorted to sort position SP02.
Select OK.
You receive the following message: "The container is already sorted to position SP02. Close the position?" 
Select Close.

Work is completed.

Now the work has been created to move the goods to Baydoor


You must complete the sorted inventory picking work. When it's completed, the inventory will be picked to the sales order. 

On the mobile device select Load from Sorting.

Enter the LP ID from the sort position, LP02. 

Select OK.

The Sorted inventory picking: Pick page shows the pick work that must be done. Pick from the SORT location and target LP LP02.
Select OK.

The Sorted inventory picking: Put page shows the put work that must be done. Put to the Baydoor location and target LP LP02.
Select OK.

Work is completed.
You are done with Sorting and moving sorted containers for the shipping. 

That's it!