Monday, July 4, 2022

Purchase agreement matching policy in Microsoft Dynamics 365 Supply Chain Management

In this blogpost I would like to go through the feature and explain what has been done in scope of this feature.

Name: Purchase agreement matching policy

Description: This feature enables you to define a matching policy on the Purchase agreement that all associated documents will adhere to.


Within this feature the following capabilities were introduced:
  • Users can now define an invoice matching policy to use for purchase orders released from a purchase agreement. 

When this feature is enabled and Enable invoice matching validation parameter is enabled (Accounts payable > Setup > Accounts payable parameters > Invoice validation tab > Invoice validation section), a new field 'Line matching policy' will appear on the Purchase agreement classification page (Procurement and sourcing > Setup > Purchase agreement classification).


When this feature is enabled and Enable invoice matching validation parameter is enabled (Accounts payable > Setup > Accounts payable parameters > Invoice validation tab > Invoice validation section), a new field 'Line matching policy' will appear on the Purchase agreement page (Procurement and sourcing > Purchase agreements > Purchase agreements).


If the Allow matching policy override on the Accounts payable parameters page is set to 'Higher than company policy' and you are attempted to select a lower matching policy then defined in the parameters, you will get an error message: The line matching policy cannot be changed to a lower line matching policy than %1.

When Purchase agreement is released, matching policy on the purchase order will be defaulted from the purchase agreements. 

Setting 'Higher than company policy' will update Purchase agreement classifications and purchase agreements to Company policy with additional dialog popping up: At least one line matching policy is lower than the company line matching policy. The lower matching policies may exist on purchase order lines or in the Matching policy form. Do you want to set all of them to use the company line matching policy?

That's it!

Purchase agreement responsible party feature in Microsoft Dynamics 365 Supply Chain Management

In this blogpost I would like to go through the feature and explain what has been done in scope of this feature.

Name: Purchase agreement responsible party

Description: This feature enables the ability to define a primary and secondary responsible party on the Purchase agreement classification form and resulting Purchase agreements.


Within this feature the following capabilities were introduced:
  • Allow users to identify the employees that are responsible for maintaining purchase agreements. 
  • Users can now mark a Purchase agreement as 'closed' to signal the agreement is no longer actively used, making it so users will not be able to create release orders from the purchase agreement. 

When this feature is enabled, two new fields will appear on the Purchase agreement classifications page (Procurement and sourcing > Setup > Purchase agreement classification)
When you define the responsible workers, a secondary responsible worker cannot be defined without a primary responsible worker. The same worker cannot be defined as both the primary and secondary responsible worker.

When Purchase agreement is being created, Primary and secondary responsible workers fields are getting defaulted from Purchase agreement classification page.

Purchase agreements can now be marked as 'Closed'. This status appropriately indicates to the user that this document will no longer be in use moving forward. Additionally, the Confirmation and Pro forma buttons in the action pane are disabled. 
Like for the On hold purchase agreements, you cannot select Closed purchase agreements in the Purchase order creation dialog. 

That's it!

Thursday, June 2, 2022

Import vendor catalogs: from setup to importing a sample catalog in Microsoft Dynamics 365 SCM

 I would like to start this blog post with the list of useful links.

To get more details, please visit the following sites:

Now let\s jump into configuration. 

Catalog import product approval

This type of workflow processes all the products that are included in the catalog file. Completion of all of the individual line-level workflow completes the overall catalog import workflow. In order to create a product approval workflow:

• Click Procurement and sourcing > Setup > Procurement and sourcing workflows.

• On the Action Pane, select New.

• Select Catalog import product approval and then select Create workflow.

General setup

The common catalog import product approval workflow should look like this:


Set up approvers
  • Double click the Catalog import product approval element.
  • Select the Step 1 element.
  • Select Assignment in the action pane.
  • The simplest assignment would be User->Admin.
Set up automatic actions
Automatic actions allow the workflow framework to automatically approve or reject the products in the imported vendor catalog which meet certain conditions. In order to set up an automatic action you need to:
  • Select the Catalog import product approval element.
  • Select Automatic actions in the action pane.
  • Select the Enable automatic actions check box
  • Setup the conditions for auto approval/rejection
  • Select the type of automatic action (approve/reject)

Catalog import approval

This type of workflow is used for setting up the rules for approving the whole catalog. When you configure this workflow, you can reference the Catalog import product approval workflow that you configured earlier. The common setup would be to automatically approve the whole catalog import after all the products have been approved:


In the properties of the Vendor catalog lines (products) element you need to reference the catalog import product approval that you created earlier. If the previous created workflow is not visible in the lookup, make sure that previous workflow was activated. 

As the result, 2 workflows have been created.

Setup the import project
In the Data management workspace, refresh Data entity list.
Set up an import project in the Data management workspace.
Import the sample file.

The sample file that I used:

<?xml version="1.0" encoding="UTF-8" standalone="yes"?>
<Document xmlns:xsi="http://www.w3.org/2001/XMLSchema-instance">
<CatVendorCatalogMaintenanceRequestEntity>
<UPLOADDATETIME> </UPLOADDATETIME>
<CatVendorProductCandidateEntity>
<PRODUCTSUBTYPE>1</PRODUCTSUBTYPE>
<VENDORCATALOGMAINTENANCEREQUESTUPLOADDATETIME> </VENDORCATALOGMAINTENANCEREQUESTUPLOADDATETIME>
<PRODUCTNUMBER>LCTest6</PRODUCTNUMBER>
<ACTIONTYPE>1</ACTIONTYPE>
<BARCODE> </BARCODE>
<PRODUCTCATEGORYHIERARCHYNAME>Procurement - Office Supplies</PRODUCTCATEGORYHIERARCHYNAME>
<PRODUCTCATEGORYNAME>Computers</PRODUCTCATEGORYNAME>
<SEARCHNAME>Insurancesearchname</SEARCHNAME>
<CatVendorProductCandidatePurchasePriceEntity>
<VENDORCATALOGMAINTENANCEREQUESTUPLOADDATETIME> </VENDORCATALOGMAINTENANCEREQUESTUPLOADDATETIME>
<PRODUCTCANDIDATEPRODUCTSUBTYPE>1</PRODUCTCANDIDATEPRODUCTSUBTYPE>
<PRODUCTCANDIDATEPRODUCTNUMBER>LCTest</PRODUCTCANDIDATEPRODUCTNUMBER>
<CURRENCYCODE>USD</CURRENCYCODE>
<UNITSYMBOL>ea</UNITSYMBOL>
<PRICE>200</PRICE>
</CatVendorProductCandidatePurchasePriceEntity>
<CatVendorProductCandidateSalesPriceEntity>
<CURRENCYCODE>USD</CURRENCYCODE>
<PRODUCTCANDIDATEPRODUCTSUBTYPE>1</PRODUCTCANDIDATEPRODUCTSUBTYPE>
<PRODUCTCANDIDATECONFIGURATIONID> </PRODUCTCANDIDATECONFIGURATIONID>
<VENDORCATALOGMAINTENANCEREQUESTUPLOADDATETIME> </VENDORCATALOGMAINTENANCEREQUESTUPLOADDATETIME>
<PRICE>250</PRICE>
<SUGGESTEDPRICE> </SUGGESTEDPRICE>
<UNITSYMBOL>ea</UNITSYMBOL>
</CatVendorProductCandidateSalesPriceEntity>
<CatVendorProductCandidateDefaultOrderSettingsEntity>
<VENDORCATALOGMAINTENANCEREQUESTUPLOADDATETIME> </VENDORCATALOGMAINTENANCEREQUESTUPLOADDATETIME>
<PRODUCTCANDIDATEPRODUCTSUBTYPE>1</PRODUCTCANDIDATEPRODUCTSUBTYPE>
<PRODUCTCANDIDATEPRODUCTNUMBER>LCTest</PRODUCTCANDIDATEPRODUCTNUMBER>
<LEADTIME>1</LEADTIME>
<MAXIMUMORDERQUANTITY>1</MAXIMUMORDERQUANTITY>
<MINIMUMORDERQUANTITY>1</MINIMUMORDERQUANTITY>
<ORDERQUANTITYMULTIPLES>1</ORDERQUANTITYMULTIPLES>
<STANDARDORDERQUANTITY>1</STANDARDORDERQUANTITY>
<UNITSYMBOL>ea</UNITSYMBOL>
</CatVendorProductCandidateDefaultOrderSettingsEntity>
</CatVendorProductCandidateEntity>
</CatVendorCatalogMaintenanceRequestEntity>
</Document>

Assign vendor to the category

Select Account payable > Vendors > All vendors > General tab on the Action pane > Categories button.

Import catalog
  • Select Procurement and sourcing > Catalogs > Vendor catalogs.
  • On the Action Pane, select New.
  • Select Vendor and then enable vendor for catalog processing.
  • Enable Automated catalog import approval by selecting Enable automated approval button.


  • Select Upload file.
  • Select the file and procurement hierarchy.
  • Select OK.

New record will be inserted in the Catalog file history

Make sure that Workflow message processing and Workflow line-item notifications batch jobs are scheduled and awaiting execution. 
  • Select Workflow > Submit
  • Select Details.
Wait until it is Approved.


Status of the catalog will be set to Succeeded.

  • Select Released approved products on the Action pane.
  • Set the Release to legal entity parameter and click OK. 

Make sure that newly imported product has been released. Make sure that corresponding trade agreements are created. 

That's it!

Wednesday, June 1, 2022

Public Sector partition in Microsoft Dynamics 365 for Supply Chain Management

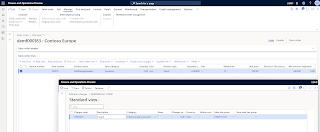
D365 SCM enables data isolation by using data partitions. So, for instance, most of the Public sector data are defined in a different partition compared to Contoso data. 

In PS (Public sector) partition, there is a PSUS legal entity that contains handy data already and you can leverage it for your Public sector testing and exploratory. So if you are testing General budget reservation functionality, for example, this partition will be ideal to use. 

You will not be able to find the PSUS legal entity from the list of available legal entity (if coming from DAT or USMF) but you can get to it straight by changing the legal entity context of the D365FO demo environment URL.

To access PSUS legal entity that is in PS partition, you will need to use the following link:

https://usnconeboxax1aos.cloud.onebox.dynamics.com/?cmp=PSUS&prt=ps

If you use this link, this will bring you to a different set of legal entities, mainly for Public sector scenarios.

That's it!
Sunday, May 15, 2022

Synchronize tracking dimensions on intercompany sales and purchase order lines in Microsoft Dynamics 365 SCM

Feature name: Synchronize tracking dimensions on intercompany sales and purchase order lines

Feature description:
This feature lets you control whether the serial and batch number tracking dimensions are synchronized across intercompany sales and purchase order lines. It adds new settings to both the "Purchase order policies" and "Sales order policies" tabs of the "Intercompany" setup page for customers and vendors. It also updates the names of a few related, nearby settings for clarity. If you are using advanced warehouse management (WMS), then be aware that this feature will only synchronize batch and serial numbers when those dimensions are above location in the target destination reservation hierarchy.


Before this feature was introduced, only tracking dimensions defined on the inventory transactions were synchronized across intercompany chain. There were 2 parameters that controlled that: "Batch number on inventory transactions" on the Purchase order policies and Sales order policies.


With the new feature, you can define tracking dimensions on the purchase order line/sales order line directly and it will be also synchronized across intercompany chain. 

Once you activate this feature, a new parameter "Batch number on order lines" will be displayed:

If Batch number on order lines parameter on the Purchase order policies tab is activated, tracking dimensions defined on the purchase order line will be synchronized to the sales order line. 

If Batch number on order lines parameter on the Sales order policies tab is activated, tracking dimensions defined on the sales order line will be synchronized to the purchase order line. 

That's it!


Tuesday, April 19, 2022

Always copy item description to purchase order purchasing policy parameter in Microsoft Dynamics 365 for Supply Chain Management

In this blog post I would like to provide the comparison table of the behavior with/without Always copy item description to purchase order purchasing policy parameter being enabled for the non-item line. 

Comparison table for the 2 settings that affects Product name and Text fields on the Purchase order page for the category line:

  • Include both name & description (path: Procurement & Sourcing > Setup> Form Setup > General)
  • Always copy item description to purchase order (path: Purchasing policies > Purchase order creation and consolidation rule > Item description transfer tab)

The configuration for the last can be found here:

When you create Purchase order line manually or through the purchase requisition process, there are 2 fields available on the purchase order line, Product name and Text fields. The logic for these fields depends on the Include both name & description parameter and Always copy item description to purchase order. 
In this scenario we are going to review non-item related line and the logic for the Product name and Text fields.

To sum up: For category items, when purchase order is being created from the purchase requisition, Product name and Text get defaulted from the Purchase requisition item description if "Always copy item description to purchase order" parameter is activated. Otherwise, it will take into consideration Include both name & description and behavior for the Product name and Text may vary. 

That's it!

Sunday, April 17, 2022

Intercompany percent functionality in Microsoft Dynamics 365 Supply Chain Management

Purpose: The aim of the Intercompany percent functionality is to address the scenario when the unit price on the IC sales order is used as equal to the cost price, and the vendor does not receive any profit margin. To compensate for the loss of profit margin, the vendor can add a charge to get a percentage of the Net amount from the original sales order line.

Business scenario: 

The Intercompany vendor sells the items to the distribution company by using the cost price as a unit price. Instead of a margin, the vendor adds a miscellaneous charge as a percent of the unit price on the Original sales order.

Example:

The unit price on the Original sales order in DEMF is $300.00 U.S. Dollars (USD). The cost price for the item in USMF is $125.00 USD. Therefore, the sales price on the Intercompany sales order is set equal to the cost $125.00. This sales price is synchronized as the purchase price to the Intercompany purchase order in DEMF.
If a miscellaneous charge on the sales order line of the Intercompany sales order is set to Intercompany percent in the Category field, and the charge value of 10 is set up, 10 percent of the unit price of the Original sales order is added. In this example, this is 10 percent off  $300.00 or $30.00.

Walkthrough: 

Setting Unit price equal to cost price
  • Open USMF > Sales and marketing > Customers > All customers and select an Intercompany customer. 
  • Select General and then Intercompany on the Action Pane. 
  • Select Sales order policies. 
  • Select the Unit price equal to cost price parameter to use the cost price instead of trade agreements or the defined sales price on the item.  
  • If the "Unit price equal to cost price" parameter is selected, you can select the Initiate original customer invoice posting parameter. This means that if the posting of the invoice on the Intercompany sales order is stopped because of an error, the invoice on the Original sales order is posted anyway.

Setting Auto charge for the Intercompany percent
  • Go to USMF > Accounts receivable > Setup > Charges setup > Auto charges.
  • Change Level to Line. Note: Intercompany percent is allowed only on intercompany sales/purchase order lines.
  • Select New and fill in the required fields.

Process:

Go to DEMF > Accounts receivable > Orders > All sales orders
Create a new sales order for DE-010 customer
Create a new line for D0001 item, qty = 3 pcs, unit price = 600 euro
Select New Purchase order on the Action pane > Include > OK.
Go to the DEMF > Purchase order created and make sure that Charges have been added.
Go to the USMF > IC Sales order created and make sure that Charges have been created as well.


Note: I would like to explain what is going on with prices and how they are synchronized to the purchase order. In the presented scenario, for the intercompany customer on the Intercompany setup > Sales order policies configuration, "Price and discount search" parameter was activated. It means that when IC SO is created, the system will try to find the sales price. In this case, a valid sales trade agreement for 330 USD was found, later on this price was synchronized back to the IC PO. Since "Unit price equal to cost price" parameter is also activated, when reservation is done on the IC SO, the actual cost of the item will be identified, and unit price will be updated on the IC SO and then synchronized back to the IC PO. Keep in mind that cost identification cannot happen immediately when IC SO is created, it can happen only when inventory is reserved (manually, on through packing slip posting etc.).

In the IC SO, complete reservation and packing slip posting. Note that unit price is updated by the cost price of the item.
In the IC SO, post invoice. Once posted, check the charges. 

Misc. charge amount calculated as a percent of the Net amount of the original sales order line (in company DEMF). 
The Net amount of the Original order is 1200 EUR. If you calculate it in the currency of the IC SO (USD) it would be 1643.84 USD. You can use Totals page from the Original SO and by changing the currency you can identify the right amount and exact exchange rate. 

So, 5 % of the 1643.84 USD is 82.19 USD.
Now, proceed with IC PO posting process: Confirm, post Product receipt and Invoice the PO. 

That's it!